You can manage your data in SQL Server and access it in both Maptitude and Power BI. This process involves setting up your database, geocoding your data in Maptitude, and then visualizing it in Power BI. Learn more about geocoding software to enhance your data management capabilities.
Managing your data in SQL Server allows for centralized data storage and easy access across different platforms. This tutorial will guide you through the steps to set up your database, geocode data in Maptitude, and visualize it in Power BI, ensuring seamless data management and accessibility.
Table of Contents
1. Download and Install Software
2. Create a Local Database in SQL Server
3. Geocode Data in Maptitude
4. Export Data to SQL Server
5. Create a View in SQL Server
6. Visualize Data in Power BI
7. Update Data and Refresh Power BI
8. Line, Polygon and Area Layers
Step 1: Download and Install Software
- Download and install Microsoft Power BI Desktop.
- Download and install Microsoft SQL Server Management Studio (SSMS).
- Download and install a free trial of Maptitude mapping software, or use your own license of desktop Maptitude.
Step 2: Create a Local Database in SQL Server
- Open SSMS.
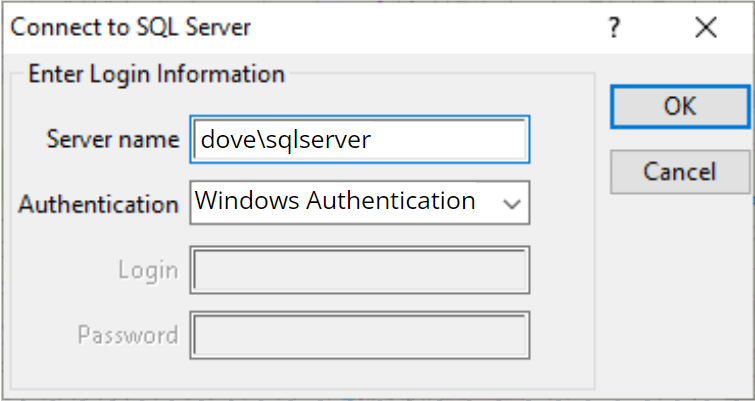
- Create a new local database named “Sites”.
- Follow the instructions in this guide.
Step 3: Geocode Data in Maptitude
- In Maptitude, geocode the logistics tutorial “Sites” sheet included with your Country Package.
- For the USA, this file is typically located at: “C:\Users\[user]\Documents\Caliper\Maptitude [202x]\Tutorial\Logistics United States.xlsx”.
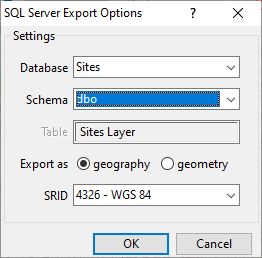
Step 4: Export Data to SQL Server
- Export the layer in Maptitude to SQL Server Spatial: File>Export>Geography>SQL Server Spatial.
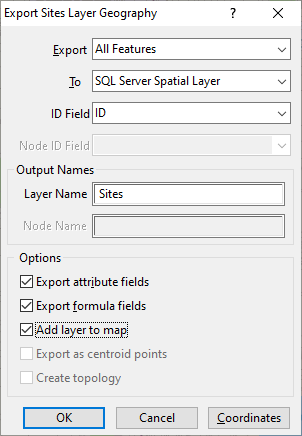
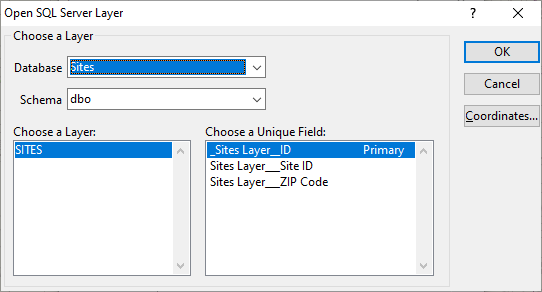
- To add the layer to any map: Map>Layers>Add Layer>SQL Server Spatial Layer
Step 5. Create a View in SQL Server
- In SSMS, choose New Query.
- Copy and paste the following SQL code:
CREATE VIEW dbo.SitesWithCoordinates AS
SELECT
   *,
   Location.Long AS Longitude,
   Location.Lat AS Latitude
FROM
dbo.SITES;- Click Execute
Step 6. Visualize Data in Power BI
- Open Power BI Desktop.
- “Select a data source or start with a blank report” == “SQL Server”
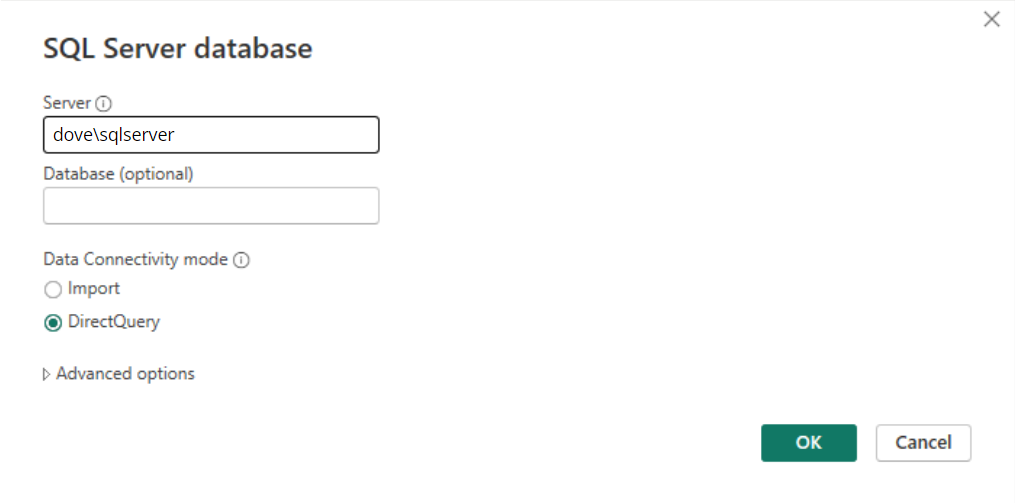
- “Select a data source or start with a blank report” == “SQL Server”
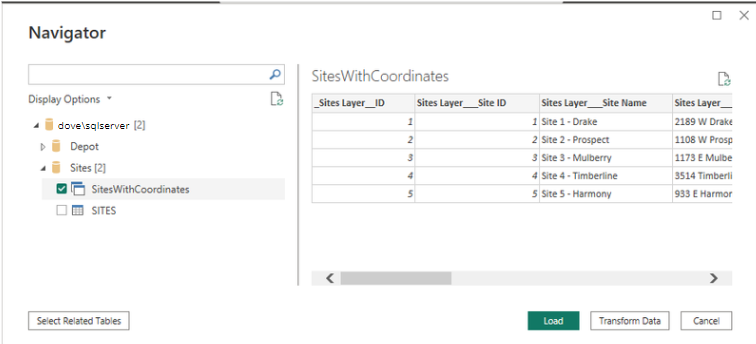
- Choose the view dbo.SitesWithCoordinates
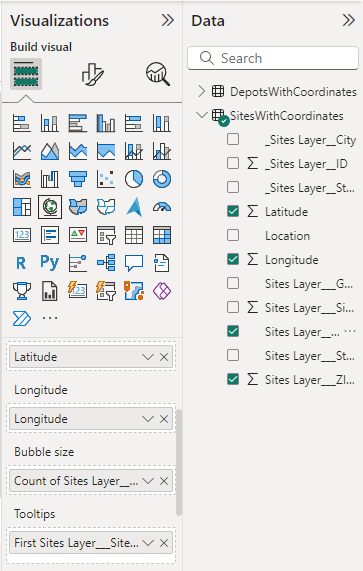
- Choose the Map visualization and drag and drop your Longitude and Latitude columns.
- You can also use a numeric field to display bubbles and a text field to label the locations as Tooltips.
Step 7. Update Data and Refresh Power BI
- In SSMS, right-click on the table and choose Edit Top 200 Rows to enter more information.
- Enter two new sites.
- In Maptitude, open a new dataview for the SQL Server Spatial layer.
- In Power BI, choose Home>Refresh to update the map with the new records.
- You can also add and remove records directly in a Maptitude dataview.
- The map shows the new records.
Step 8. Line, Polygon, and Area Layers
- You can also export area layers such as drive-time rings to SQL Server Spatial and view them in “Power BI Report Builder”
- You can also use custom maps with Shape Map in PowerBI as long as they are in the TopoJSON format. If your map is in another format, you can use online tools such as Map Shaper to convert your shapefiles or your GeoJSON maps into the TopoJSON format.
By following these steps, you can effectively manage your data in SQL Server and access it in both Maptitude and Power BI.