Last Updated: March 5, 2025
You can add data to your territories using sales territory mapping software.
When building territories we often have data that we want to attach to the territories. This can come in two forms:
- Data at an individual sales/delivery level that we want to add up/aggregate and tell us the total sales by territory. This is data where we know the individual location for each record and want the total of some data for each territory
- Data that is already known at the territory level and we just want to attach and display this data. An example of this is if you have the territories grouped into regions or if you have a target sales value for each territory.
In the first case, you should use the “Tracking Fields” functionality discussed in these tutorials:
Using the Maptitude Territory Wizard
Working with territories in Maptitude
How do I add Tracking Fields to my Territories?
In the second case, you can try the steps below:
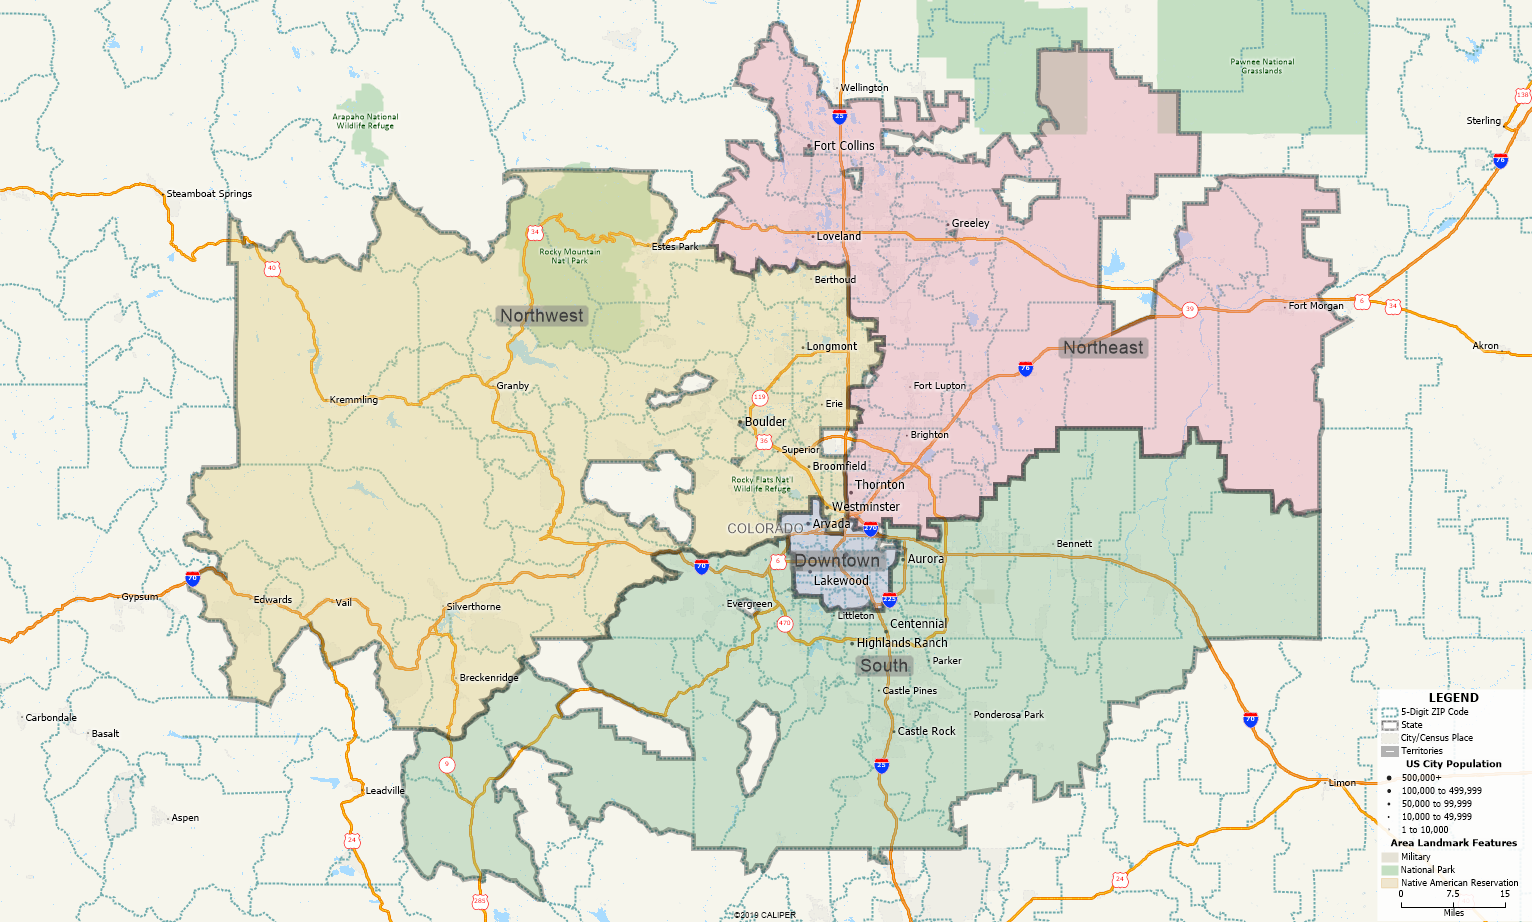
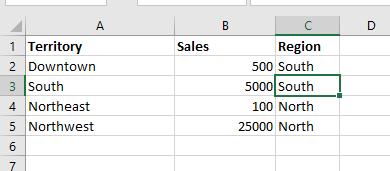
In this article we will be using a territory map created from the US Tutorial file and a table containing Sales and Region information for each territory:


The following steps will go over how to add the data in your table to a territory map:
- Open your workspace containing your territory map.
- Go to File>Open and change the file type to your data table (e.g. Excel Worksheet).
- Search for the table and click Open. Click OK to open the table into the workspace.
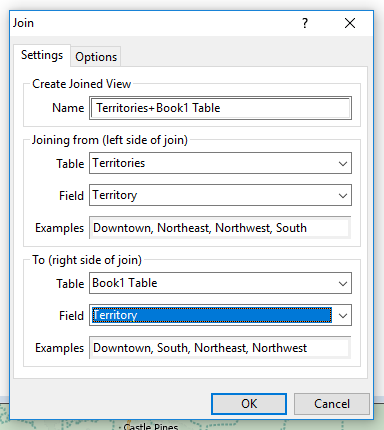
- With the Dataview for new data open, go to Dataview>Table>Join or click
 .
. - Use the following settings where, under To (right side of join):
- Table is the table containing the data to attach
- Field is the field on that table containing the names of the Territories

- Make sure the values in Examples match each other
- Click OK
This will join the data from your table to the Territory layer, which you can use as labels or with any of the themes.
To edit the labels for a territory, see Working with Labels on Maptitude Maps
To apply a theme for your territory layer, see How do I change the way my Territories look?
