Last Updated: April 19, 2024
You can create radius rings or buffers that contain a target value using geographic analysis mapping software.
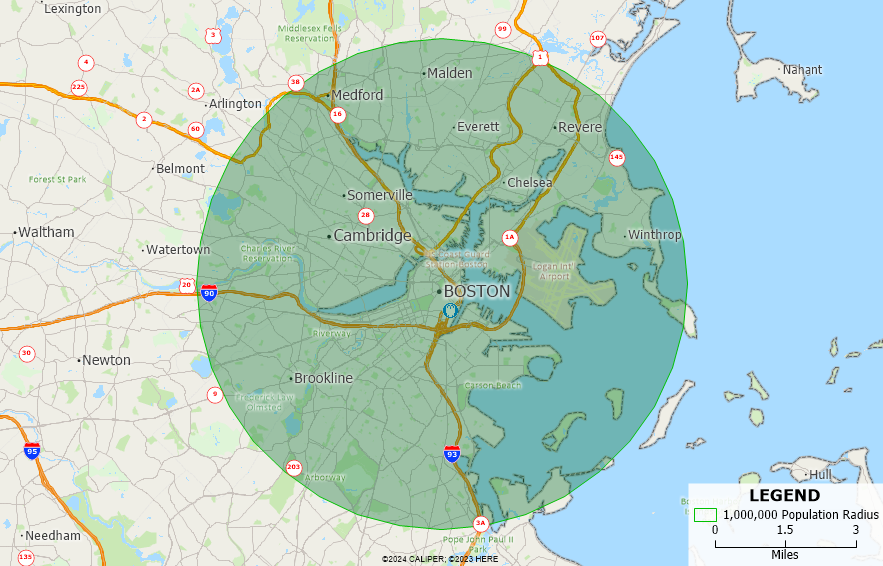
When analyzing a location for its viability and coverage, it can be useful to visualize a radius or area that encompasses a specific value of data.
Maptitude contains geographic analysis tools that makes it easy to create radius areas that reach a target value.

Before trying out the steps below, you can use your license of Maptitude Desktop or request a free trial of Maptitude Desktop.
Add Locations by Clicking on the Map
- Go to Tools>Analysis>Buffers Toolbar.
- Use the Add Temporary Points button to add the central locations for your radius analysis.
- When finished, click the Create Buffers button.
Add Locations Using Your Own Data
- Map your own data using the Create-a-Map Wizard by following the tutorial on mapping your own data in Maptitude.
- Make the newly added layer the working layer.
- Go to Tools>Analysis>Buffers.
Create the Buffers
- In the Buffers settings, choose the Build to Value method.
- In the Layer drop down, choose the layer that contains the data field you would like to use.
For example, if you would like to use demographic data at the 5-Digit ZIP Code level, you can specify the 5-Digit ZIP Code layer here. - In the Field drop down, choose the data field you would like to use.
For example, if you would like to calculate the total population in the radius analysis, choose the Population field. - In the Values text box, enter the value that you want to reach with the radius analysis.
For example, if you enter 10,000, the radius will be sized to contain about 10,000 people in the area that it covers. - Optionally, you can check Separate Buffers if you have multiple locations and want to create the radius separately for each location.
- Click OK and Maptitude will create the radius analysis.
For more information on creating buffers or radius analysis, please see the tutorial video on creating buffers.
