Last Updated: March 5, 2025
There are two different ways that you can do this in Maptitude. Users can use image files to represent their locations, and several small .bmp files are included with the software. The second way is to use a “scaled symbol” or “Size” theme.
Note that these methods cannot be used in conjunction with a color theme or a multiple symbol theme.
The two different methods are described below. These methods are separate and should not be used together.
Method 1: Using image files to represent your locations
- Create a new map or open an existing map with your locations.
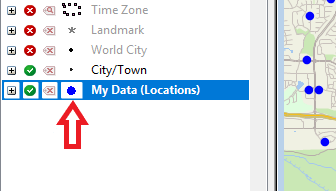
- Double click on the symbol icon to the left of the layer name for your locations to bring up the Style dialog box.

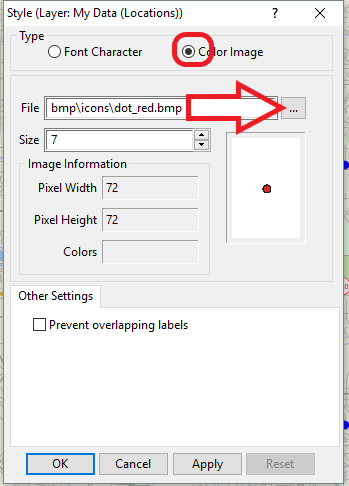
- Check the “Color Image” radio button and click on the browse ellipsis to find the image file you want to use.

- Maptitude includes several small bmp files in C:\Program Files\Maptitude 2019\bmp\icons. Users can use these, many of them have an outline or border. Users can also use their own image files, including corporate logos. Most common image file formats and sizes are supported.
Method 2: Using the Chart Theme to represent your locations
- Create a new map or open an existing map with your locations.
- Make your location layer the working layer.
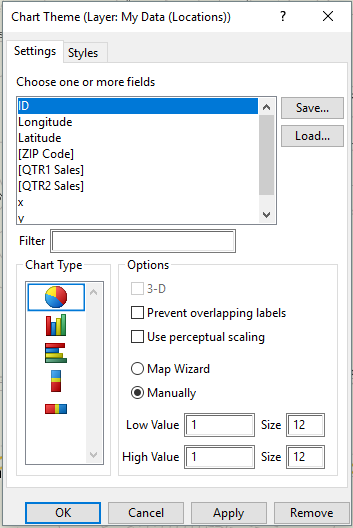
- Choose Map-Thematic Mapping-Chart… to open the Chart Theme dialog box
- There are two tabs on the dialog. Begin with the Settings tab and then go to the styles tab.
- Use these settings for the “Settings” tab:
- Use ID for the field
- Choose the Pie chart
- Check the box for “Manually”
- For both the Low and High Value, enter 1
- For both Size values, enter a font size (this will determine the size of your symbols)
- Now click on the “Styles” tab

- Use these settings for the “Styles” tab
- Enter a value in the “Legend Text” box if you want to have a Legend entry for your locations
- Click on the Styles button to open the Styles dialog box and adjust the outline color, outline width, fill color and opacity to meet your needs. Click OK and OK again to see your new symbols on the map.
- Use these settings for the “Settings” tab:
