Last Updated: March 5, 2025
You can find all the ZIP Codes in your territory using sales territory mapping software.
Simple ZIP Code Export
The latest version of Maptitude introduced the ability to list all ZIP codes in your territory with a single click.
- From a Maptitude map or workspace that has Territories included, simply turn on the “5 Digit ZIP point” layer in the Display Manager. The
 indicates that the layer is on.
- Click
 in the Territory Manager to export your territory data to Excel.
 - Highlight the territories you want to export and click Add.

- Click OK.
Maptitude exports the selected territories to an Excel sheet and includes that information on the sheet named 5-Digit ZIP Point.

ZIP Code Export using an Older Version of Maptitude
You can still obtain ZIP codes for all of your territories using an older version of Maptitude.
These steps will guide you through the process of exporting all of the ZIP codes (point and area ZIP codes) for your territories.
From a Maptitude map or workspace that has Territories included, simply turn on the “5 Digit ZIP point” layer in the Display Manager. The ![]() indicates that the layer is on.
indicates that the layer is on.
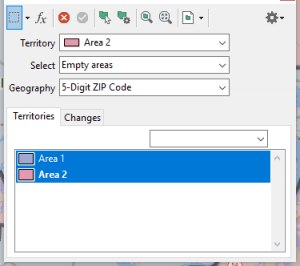
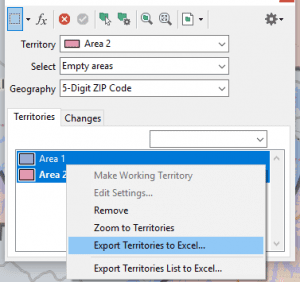
Now right-click the Territory name in the Territory manager and choose Export Territory to Excel. Note that if you do not need the ZIP points, simply right-click the Territory name in the Display manager and choose Export Territory List to Excel.
This will create an Excel spreadsheet with several tabs. The final tab will be called “5 Digit ZIP Point and will include a list of all the ZIP codes, including both Unique and non-unique ZIP codes.
Point ZIP Code Export with Territory Assignment
These steps will guide you through the process of exporting all of the ZIP codes (point and area ZIP codes) for your territories.
There are three tasks that need to be completed for this: Make a copy of the 5 Digit ZIP code points layer, tag with your Territories, and then export using the tools in the Territory Manager.
Task 1 – Create a copy of the ZIP code point layer
Included with Maptitude is a ZIP code point layer that provides all of the ZIP codes for the US. We advise making a copy of this file first so that the original data remains intact.
- Open or create a map that contains your Territories in it.
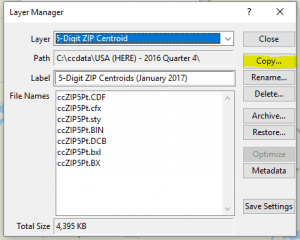
- Go to Tools > Editing > Layer Manager. This will open the Layer Manager dialog box.
- Make sure that the 5-Digit ZIP Point layer is chosen in the Layer drop-down and choose Copy from the choices on the right. You will be prompted to save a file. Make sure you pick a location where you can permanently keep your new layer and someplace you can remember. Additionally make sure you pick a location that you have write access for, as Step 2 will fail if the folder is read-only.

- Now you will need to remove the ZIP code point layer from the map and add this copy. Go to Map>Layers. Highlight the 5 Digit ZIP Point layer and choose Drop Layer from the choices on the right. Now choose Add Layer and find the copy that was created in the previous step. Click Close. This will add the copy as a new layer to the Map.
Task 2 – Tag the ZIP Codes with the Territory
These steps will “tag” the ZIP Code points using the name of the Territory that each ZIP Code is in.
- Make sure that the 5 Digit ZIP Point layer is the working layer (right-click the layer name and choose Make working layer).
- Go to Tools > Analysis > Tag Points by area and set up the dialog as below.
- For Tag Points in choose All Features.
- For Layer choose Territories (or whatever your territory layer is called)
- For Using Areas in use All Features
- For Tag With choose Territory.
- Click OK. This has added a new field to the 5 Digit ZIP Point layer that includes your Territory name.

Task 3 – Export using the Territory Manager
Using the Territory Manager this will export the list of ZIP Codes from the 5-Digit ZIP Point layer, which includes a city name, and the name of the Territory if you did Step 2.
- It is a good idea to turn off the City/Town layer so that it is not included in the export, but this is your choice. If you would like to turn it off just click on the on/off symbol
to the left of the layer name. This is not necessary but might be helpful.
- From the Territory Manager, highlight your entire list of Territories.

- Right Click on one of the highlighted Territories and choose Export Territories to Excel.

- The resulting Excel file will include a tab/sheet called 5 Digit ZIP Point that includes a column called Name. This should give you a good idea of the towns and cities in your territory. This will also include a column called Territories: Territory that includes the name of your territories.
For more information on creating territories, please see the video tutorial on creating territories.
For more information on managing territories, please see the video tutorial on managing territories.
